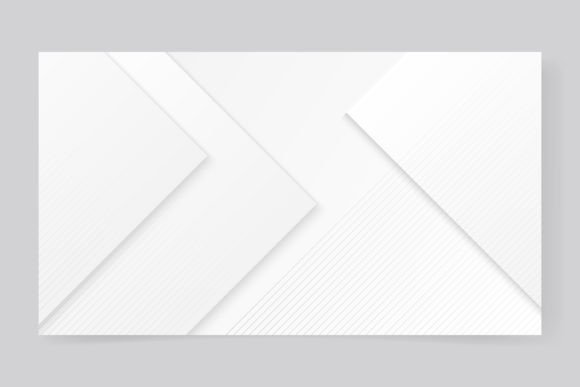
White Background with Diagonal 3d Design: A Guide to Professional Visuals
In the crowded digital landscape, first impressions are often dictated by visual clarity and modern aesthetics. This is where a white background with diagonal 3d design becomes an invaluable asset for creators, marketers, and business owners. It offers a clean, sophisticated canvas that draws attention to your content without overwhelming it. However, simply downloading a file is not enough. Many users overlook critical details regarding format compatibility, resolution quality, and proper application, which can lead to frustrating results. Understanding how to correctly utilize these assets ensures your projects maintain a high standard of professionalism.
Understanding the Value of Minimalist 3D Geometry
The appeal of this specific design style lies in its balance. The white space provides breathing room, essential for readability and focus, while the diagonal 3D shapes add depth and dynamic movement. Unlike flat designs, which can sometimes appear static or dated, the three-dimensional element introduces a subtle sense of luxury and modernity. This makes it particularly effective for corporate presentations, product launches, social media graphics, and website headers.
When you choose an elegant white background with diagonal 3d shape design, you are opting for versatility. It serves as a neutral foundation that complements various color palettes and typography styles. Whether you are a freelancer creating a portfolio or a small business owner designing marketing materials, this backdrop allows your primary message to stand out. The diagonal orientation guides the viewer’s eye across the composition, creating a natural flow that enhances engagement.
Common Mistakes When Selecting and Using Background Assets
Despite the simplicity of the concept, errors in selection and implementation are common. These mistakes often stem from a lack of technical knowledge or rushing the procurement process. Avoiding these pitfalls can save time, money, and effort.
Ignoring File Format Compatibility
One of the most frequent errors is downloading a file format that does not suit the intended use case. Many beginners assume that a JPEG is sufficient for all purposes. While JPEGs are easy to use, they are raster images, meaning they lose quality when scaled up. If you attempt to stretch a low-resolution JPEG for a large banner or print material, the image will become pixelated and blurry, undermining the professional look you aim to achieve.
The Better Approach: Always check what formats are included. High-quality assets, such as those from CLton Studio, typically include AI (Adobe Illustrator), EPS (Encapsulated PostScript), and JPEG formats. Use the AI or EPS files for any project requiring scaling, such as large prints or responsive web designs. These vector formats ensure crisp edges and perfect clarity at any size. Reserve the JPEG for quick digital uses where scaling is not required.
Overlooking Resolution and DPI Requirements
Another overlooked detail is the resolution of the raster files. A background that looks sharp on a smartphone screen may appear grainy on a desktop monitor or in print. Users often fail to verify the dots per inch (DPI) of the JPEG file. For web use, 72 DPI is standard, but for print, you need at least 300 DPI. Using a web-optimized image for a printed brochure results in a muddy, unprofessional appearance.
Practical Advice: Before finalizing your design, zoom in to 100% on your intended output device. If the edges of the 3D shapes show jagged lines or artifacts, the resolution is insufficient. Always prioritize sources that provide high-resolution exports alongside vector files.
Misjudging Color Contrast and Readability
While a white background is inherently clean, adding text over 3D elements requires careful consideration. A common mistake is placing light-colored text over the lighter parts of the 3D shadow or highlight areas. This reduces contrast and makes the content difficult to read, causing eye strain for your audience. Some users also ignore the directional lighting of the 3D shape, placing key information in areas where the visual weight distracts from the message.
How to Avoid This: Use dark, bold typography to ensure strong contrast against the white and shaded areas. Alternatively, use semi-transparent overlays if you must place text over complex parts of the design. Always test readability on multiple devices and lighting conditions.
What to Check Before Downloading or Purchasing
To ensure you get the best value and usability from your background collection, perform a few checks before committing to a download. These steps help verify quality and compatibility with your workflow.
- Verify Vector Editability: If you plan to change colors or adjust the angle of the diagonal shapes, ensure the AI or EPS files are fully editable. Some free resources provide flattened vectors that cannot be easily modified. Check if the layers are organized and labeled.
- Assess the Complexity of the 3D Effect: Not all 3D designs are created equal. Some may have overly complex shadows that clash with your content. Look for a design that offers subtle depth rather than aggressive protrusion. The goal is enhancement, not distraction.
- Check License Terms: Ensure the license allows for your intended use, whether commercial or personal. Misunderstanding licensing can lead to legal issues later. Reputable shops like CLton Studio clearly outline usage rights.
- Review File Size and Organization: A well-packaged file should be easy to navigate. Bloated files with unnecessary elements can slow down your design software. Clean, organized files indicate a professional creator who values user experience.
Maximizing Efficiency with the Right Tools
Once you have secured a high-quality elegant white background with diagonal 3d shape design, integrating it into your workflow should be seamless. For non-designers, starting with the JPEG format in tools like Canva or PowerPoint is a practical entry point. Drag and drop the image, add your text, and adjust transparency if needed. This approach minimizes the learning curve while still delivering a polished result.
For professionals using Adobe Illustrator or Photoshop, leverage the vector files. You can customize the gradient meshes or shadow angles to match your brand guidelines precisely. This level of customization ensures consistency across all your marketing materials, reinforcing brand identity. Remember, the flexibility of vector formats allows you to adapt the design for different aspect ratios, from square social media posts to wide website banners, without losing quality.
Final Thoughts on Quality and Presentation
Choosing the right background is more than a aesthetic decision; it is a strategic one. A white background with diagonal 3d design offers a blend of simplicity and sophistication that appeals to a broad audience. By avoiding common pitfalls related to file formats, resolution, and contrast, you ensure that your final output is both visually appealing and functionally effective.
Always prioritize quality sources that provide comprehensive file options, including AI, EPS, and JPEG formats. This versatility empowers you to handle any project requirement with confidence. Thank you for choosing our shop, CLton Studio, for your design needs. We are committed to providing resources that elevate your creative work and support your professional growth. With the right assets and knowledge, you can create compelling visuals that communicate your message clearly and effectively.